In Microsoft Azure, you can integrate your bot with Skype, Skype for Business, Slack, Microsoft Teams, Cortana, Kik, GroupMe, Twilio, Telegram & LINE. Below, we'll explain step-by-step how to register a bot on your Microsoft Azure account.
In this article, we'll address how to do the following:
- Register your bot in Certainly's Channels
- Set up your Azure Bot
- Get your Microsoft Application ID and Password
- Add your bot to a channel in Azure
- Connect to the Certainly Platform
Register your bot in Certainly's Channels
To register your bot with your Microsoft Azure account, first open the Certainly Platform. From the right sidebar menu of the bot-building canvas, select Bot Settings, then navigate to the Channels tab.
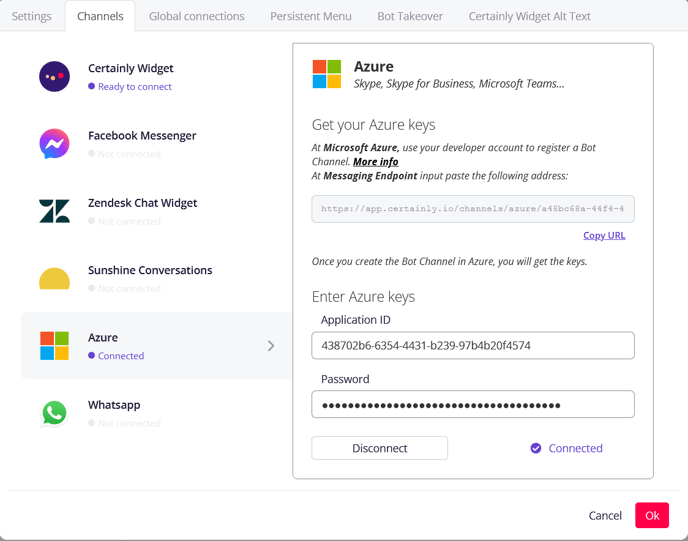
Once there, select the Microsoft Azure option on the left. You'll see a link with "Copy URL" hyperlinked below. This is the connecting link between your Azure account and the Certainly Platform, and it will be used in the Get your Microsoft Application ID and Password step below.
Set up your Azure Bot
Next, you should navigate to your Azure account, using your developer account.
- Under Azure services, select the "Create a resource" option. In the search bar, search for and select "Azure Bot".
- The Microsoft application "Azure Bot" will be displayed. Next, select the "Create" button to create your Azure Bot.
- This will take you to a page where you can register your bot. On this page, you'll enter your project details with these actions: write the Bot handle name (should be unique), select the Subscription, choose the Resource group (or create a new one), select the Pricing tier, and finally, Create new Microsoft App ID (you can also use the existing one).
- After filling in the details, click on the "Review + create" button which will take you to the page where you can see the information you provided in step 3.
- Finally, click on the "Create" button to initialize the process of creating an App ID and Password (if you selected "Create new Microsoft App ID" in step 3), followed by the deployment of your bot.
- After the deployment is complete, click on "Go to resource" to see your bot.
Get your Microsoft Application ID and Password
- Click on your Azure Bot and navigate to "Configuration" in the left side panel. You can see the Microsoft App ID which will be used as the Application ID in the Certainly Platform.
Note: In Configuration under the "Messaging endpoint" box, remember to paste the Messaging Endpoint URL provided within Bot Settings > Channels > Azure in the Certainly Platform. - To get the password, select "Manage," which is in the brackets after the "Microsoft App ID". Under the "Client secrets" section, select "New client secret", then add the description and expiration time. Select the "Add" button and you'll see the new Certificate & Secret. Copy the "Value", as this will function as the password in the Certainly Platform.
Add your bot to a channel in Azure
From the left side menu, select "Channels". Here, you'll see an overview of the various channels the bot can be integrated with.
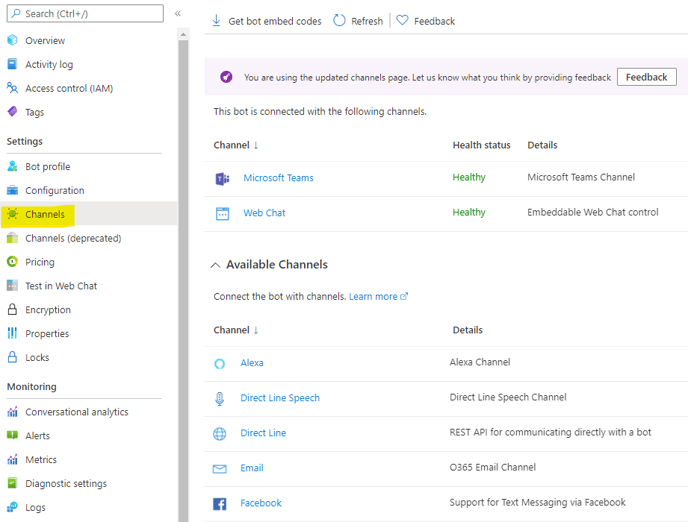
By default, the Web Chat channel is already set up. This can be tested from the Bot Emulator, available under “Test in Web Chat” in the left side menu. The same bot can be added to several channels. Please see Microsoft's overview of how to integrate the bots on the available channels.
Connect to the Certainly Platform
In the last step of the process, we come back to where we began: in the Certainly Platform.
In the Channels tab of Bot Settings, select the Azure channel and insert the Microsoft Application ID and password generated in the Get your Microsoft Application ID and Password step. Then press "Connect".
Now your bot is good to go! Please let our Customer Success team know if you have any questions.