In this article, we will provide instructions for how to:
Add a new user
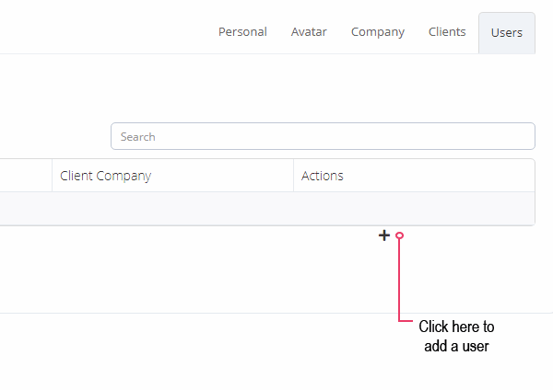
When adding new users to your Company, the first thing you need to do is head to the Navigation bar.
Once there, select the "My Profile" avatar icon in the top right corner, then click on your user name. Next, you'll need to click on the tab named "Users", where you'll be met by the page shown below. To add a user, you must click on the plus (+) symbol at the bottom right.
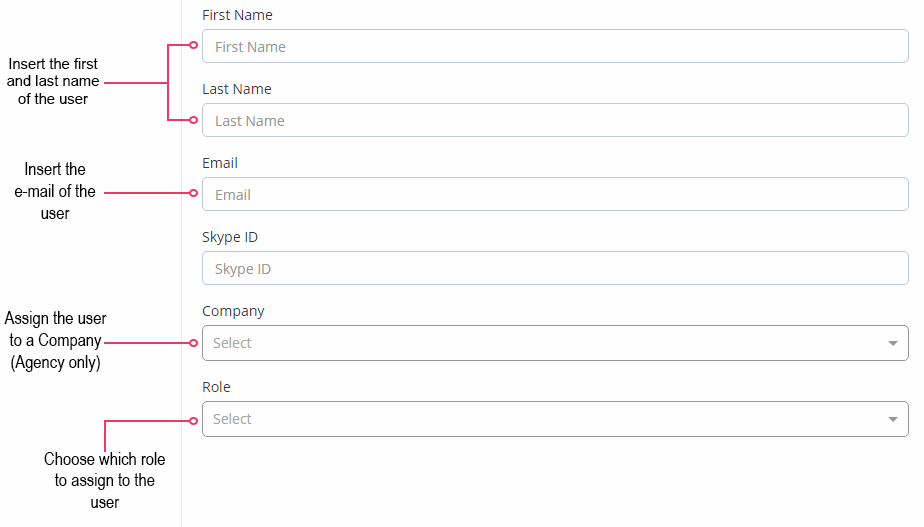
Then, you'll need to fill in the first and last names of the user as well as their e-mail. You'll also need to assign the user to a Company (if you are an Agency), and choose which role to assign to the user (more information on this can be found below).
Determine a user's role
In Role, you will have three options to pick from:
- Commerce Manager (Agency only)
- Company Admin
- Customer
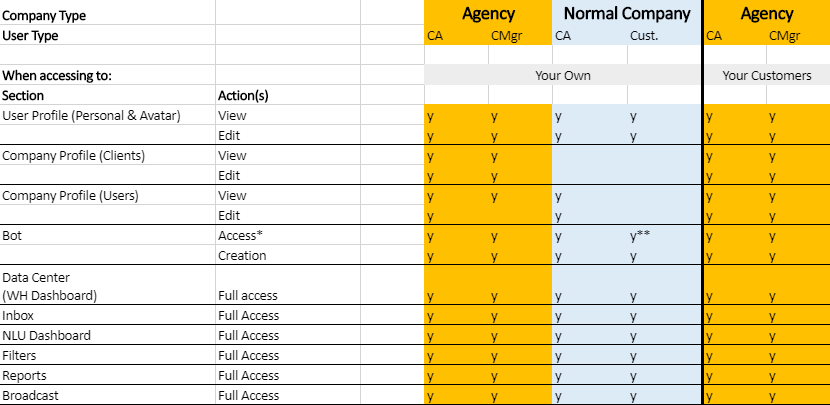
* If a user has access to the bot, that includes access to:
-
- Company AI Items (edited in the AI Manager)
- Company WH Selector (in Connections)
- Filters in Selector (in Connections)
All bots have access to everything that is created out of the canvas on a Company level.
** Customer Users only have access to their own bots or to the bots they have been invited to.
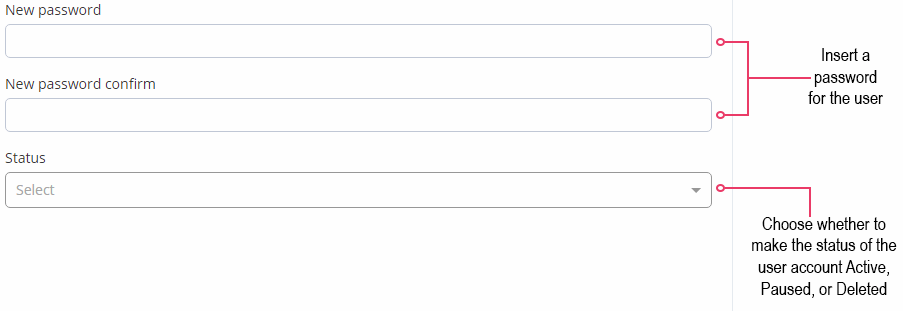
Set a user's password and status
Finally, you'll need to fill in a password for the new user and select the status of their account.