This is an advanced type of Cards, created based on information from an external source.
Unlike Generic Cards, you don’t need to manually add data to the different Cards. In this case, what is needed is a URL where the Module can retrieve the Cards in the format specified below.
In this article, we'll address the following:
- How to create Dynamic Cards
- Dynamic Cards JSON structure
- Using Dynamic Cards in conjunction with Webhooks
- Creating Dynamic Cards in Jinja2 templates
How to create Dynamic Cards
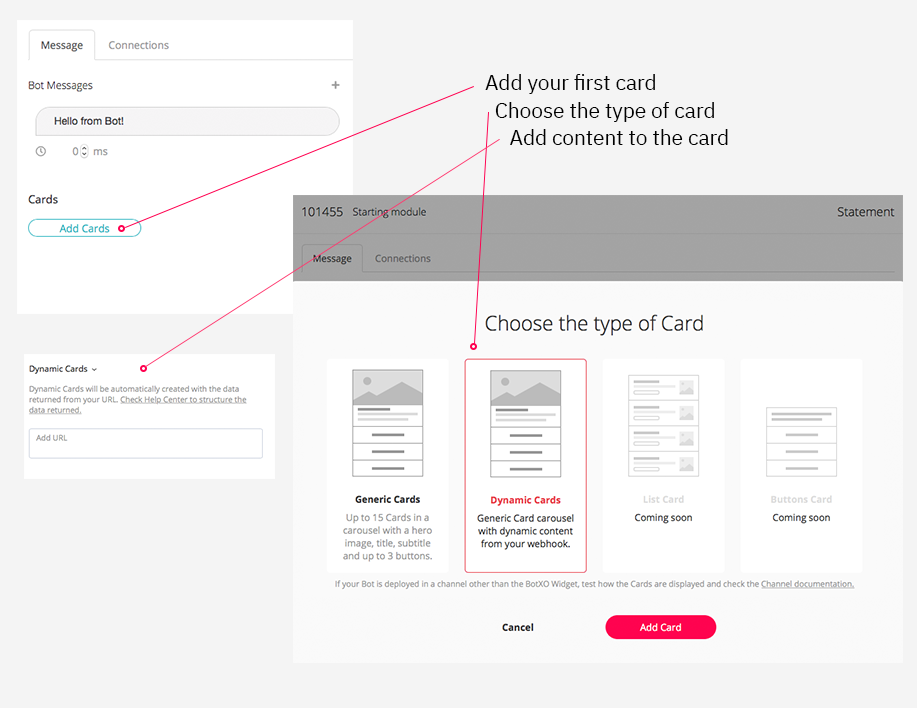
To use this feature, open a Module's message, select "Add Cards", then “Dynamic Cards”.
An input field will appear where you'll add the URL of the service that will return the Cards.
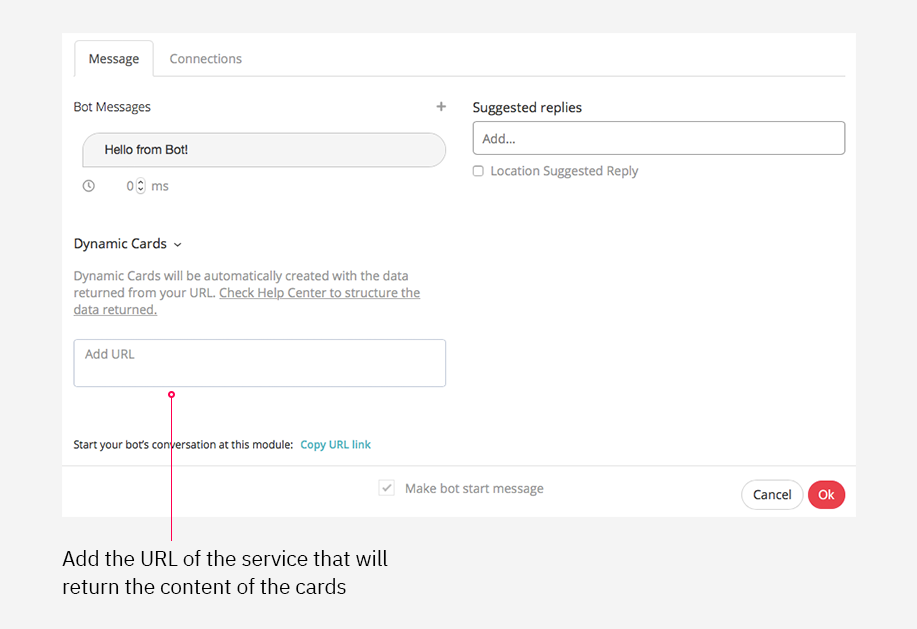
The URL accepts Custom Variables. In this way, you can add parameters in the form of query strings or Dynamic URLs. For example, with query strings it would look like this:
http://someurl.site/this/is/a/path?query1=[customVariablekey=query1]&query2[customVariable key=query2]
If no Custom Variables are added, then the URL can be used to return random Cards every time it is hit. During the conversation, the Cards returned by the external service are dynamically generated, so different Cards will be shown.
Dynamic Cards JSON structure
This is the data structure the external service must return to make Dynamic Cards work.
It is composed of an array of one or more objects with the following parts:
| Property | Type | Required | Description |
| title | String | Yes | Main header of the card, written in bold |
| subtitle | String | Yes | Subheader for the card, used to add a small description to the card's content |
| is_sharable | Boolean | Yes | If set to true, allows the card to be shared |
| image_destination_url | String | No |
Allows the user to be forwarded to an external URL if the card is clicked. Although not required for the card to render, it is highly recommended to include this property. Not including the property will not remove this behavior; instead, it will try to redirect to a nonexistent URL. |
| image_source_url | String | Yes | If a value is given, renders an image on the card |
| buttons | Array | Yes | Array of objects with each object representing a button in the card |
[{
"title": "Card title",
"subtitle":"Card subtitle",
"image_destination_url":"http://web.site/to/forward/user/",
"image_source_url":"https://www.web.site/with/img.jpg",
"is_shareable":false,
"buttons":[{
            "options":{
                       "message":"This is a message"
                       },
                       "is_active":true,
                       "type":"postback",
                       "title":"Button name"
                       }]
          }]
When configuring the Dynamic Cards in the Custom Variable mapper for your Webhook, not including any of the required properties will cause the card to not render. In these cases, the bot will render the "Fallback Message" instead.
If you want to configure a card without a specific parameter, you can do the following:
- For properties with type "String", include the property in the card configuration object but give it a value of "" (empty string). In this case, the card will render correctly, but the property left as empty will not be displayed.
- Properties with type "Boolean" are necessary, and a value must be provided.
- To hide card buttons, you can leave the "buttons" property as an empty array or configure a button and set the "is_active" property to false.
Configuration of Card buttons
The number of buttons on a Dynamic Card is limited to three. If you add more than three buttons, only the first three buttons will be taken into account.
Functionality for the buttons can be of the following types:
- Send Message: When clicked, sends a message to the bot, just like a Suggested Reply
- Webview: When clicked, the webchat opens a webview with the content of the URL
- Go To: In this case, a new tab is opened in the browser pointing to the URL
All buttons share the same properties:
- Title: The button’s title
- Is_active: Should always be true
- Type: Indicates the button type
- Options: Different for each button type
Below, you can view examples of scripts for each type of button:
Webview script
{
	"title":"Webview",
	"is_active":true,
	"options":{
	   "url":"http://www.website.com",
	   "window_size":"full"  # Options are: full, tall, compact
	},
	"type":"web_url"
}
Send Message script
{
	"title":"Send message",
	"is_active":true,
	"type":"postback",
	"options":{
	   "message":"This is a message"
	}
}
Go To script
{
	"title":"Go to",
	"is_active":true,
	"type":"web_url_tab",
	"options":{
	   "newtab_url":"http://www.google.es"
	}
}
All three button types script
[
   {
	  "image_source_url":"http://www.site/with/an/image.jpg",
	  "title":"Title",
	  "subtitle":"Subtitle",
	  "image_destination_url":"http://www.site/to/foward/user",
	  "is_shareable":false,
	  "buttons":[
		 {
			"options":{
			   "message":"This is a message"
			},
			"is_active":true,
			"type":"postback",
			"title":"Button 1 label"
		 },
		 {
			"options":{
			   "url":"http://www.google.es",
			   "window_size":"tall"
			},
			"is_active":true,
			"type":"web_url",
			"title":"Button 2 label"
		 },
		 {
			"options":{
			   "newtab_url":"http://www.google.es"
			},
			"is_active":true,
			"type":"web_url_tab",
			"title":"Button 3 label"
		 }
	  ]
   }
]
Using Dynamic Cards in conjunction with Webhooks
If you are using a Webhook that stores the result of a search in a Custom Variable, you are able to render this result as Cards in a Bot Message.
The image below displays the "zendeskResultsCards" Custom Variable, which is generated from the ![]() Zendesk Guide: Search Help Center Articles - Show Results as Cards Webhook Template. Upon firing the Webhook, this Custom Variable will be populated with data from the search query.
Zendesk Guide: Search Help Center Articles - Show Results as Cards Webhook Template. Upon firing the Webhook, this Custom Variable will be populated with data from the search query.
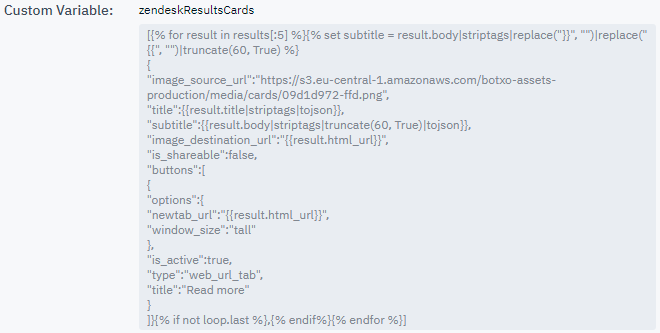
After the Webhook has been fired, we are able to render this response as Cards by inserting the following code into a bot message:
[customVariable key=zendeskResultsCards type=carrousel fallback="sample text"]
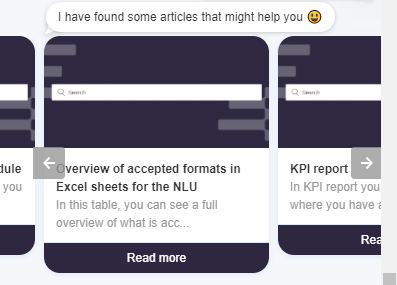
After the code has been implemented, the Cards will be rendered as shown here:
Create Dynamic Cards in Jinja2 templates
To eliminate the need for third-party APIs, you can generate Cards directly in Jinja2 templates. An example of this process is below.
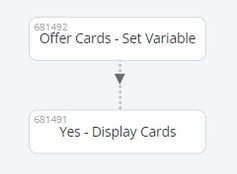
First, the flow is created with the Offer Cards – Set Variable and Yes – Display Cards Modules.
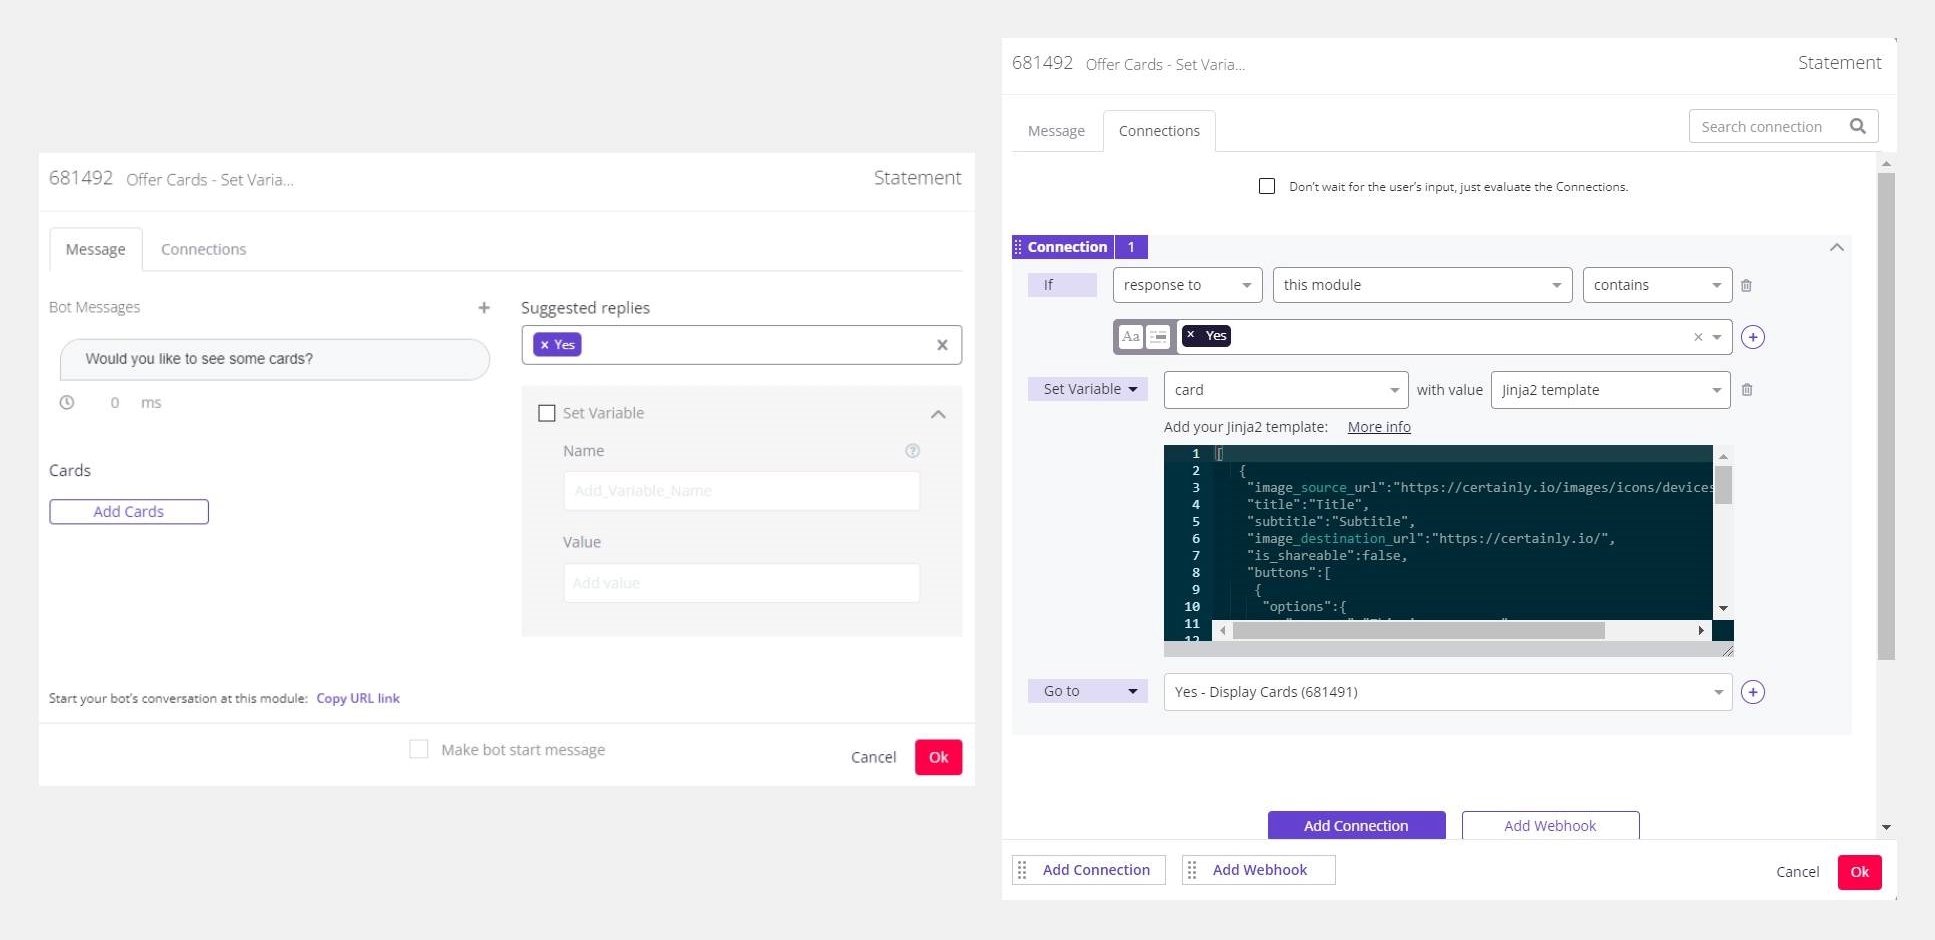
In the “Connections” tab of the Offer Cards – Set Variable Module, we set the variable “card” with value “jinja2 template” using the "All three button types script" shown above.
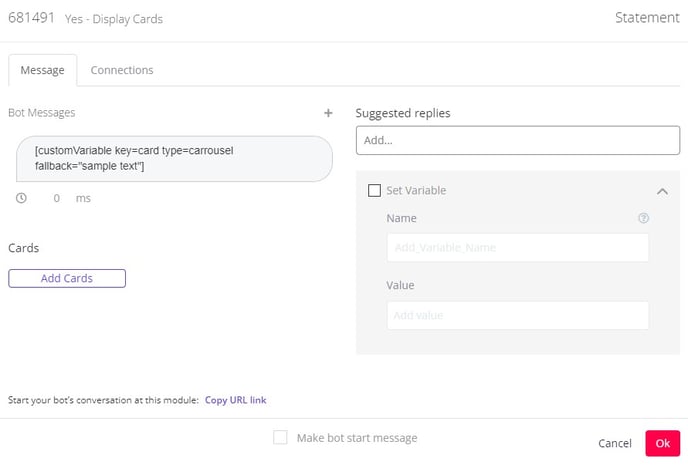
In the Yes – Display Cards Module, we enter the following code:
[customVariable key=card type=carrousel fallback="sample text"]
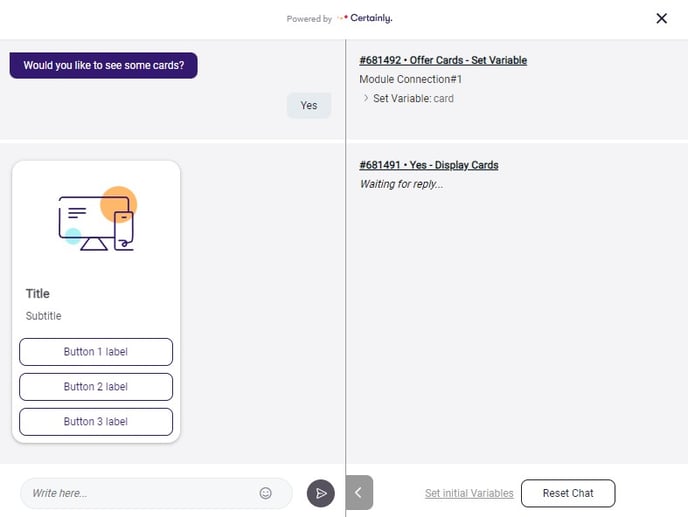
This is what the flow looks like when tested:
Questions? Just reach out to our Customer Success team!
