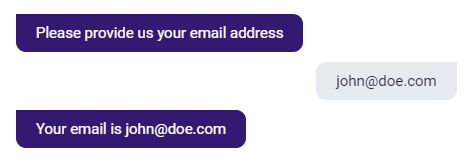
Here, we explain how to store an end user's reply in a Custom Variable through a configuration in a Module's Message tab. Please note that this is a legacy feature. It will only be visible if you were using this method at the time of deprecation.
Any existing CVars set in the Message tab prior to the September 6th, 2022 release will remain, but new CVars must be set in the Connections tab.
Below, we will provide examples of the following:
- Storing the end user reply as a name
- Storing the end user reply as an email
- Storing the end user reply as a phone number
- Tagging end users who have accepted the GDPR terms and conditions
Storing the end user reply as a name
First, we'll explain the method of saving an end user reply as a name. Because a name is just a string of text, this method is applicable in any use case where you have to store text comprised of standard characters.
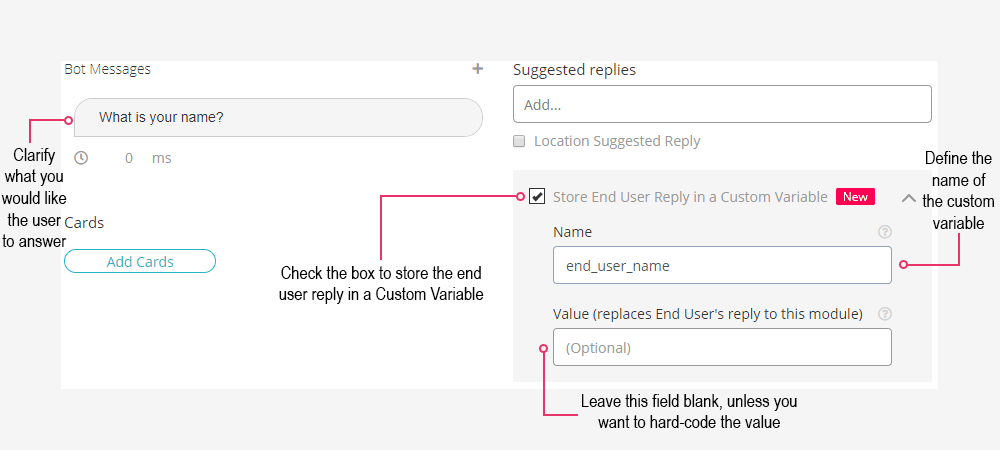
The first thing you need to do is determine the purpose of the Module. In this example, the purpose is to collect the end user's name, hence the Bot Message, "What is your name?".
Next, check the "Store End User Reply in a Custom Variable" box. This allows you to input text in the "Name" and "Value" fields.
Finally, choose what to call the Custom Variable. In this example, we opt for something easy to recognize: "user_name".
After you've saved your changes, hit refresh (F5), and the Custom Variable will be selectable in other Modules. Try including it in one of your Modules, as shown below:
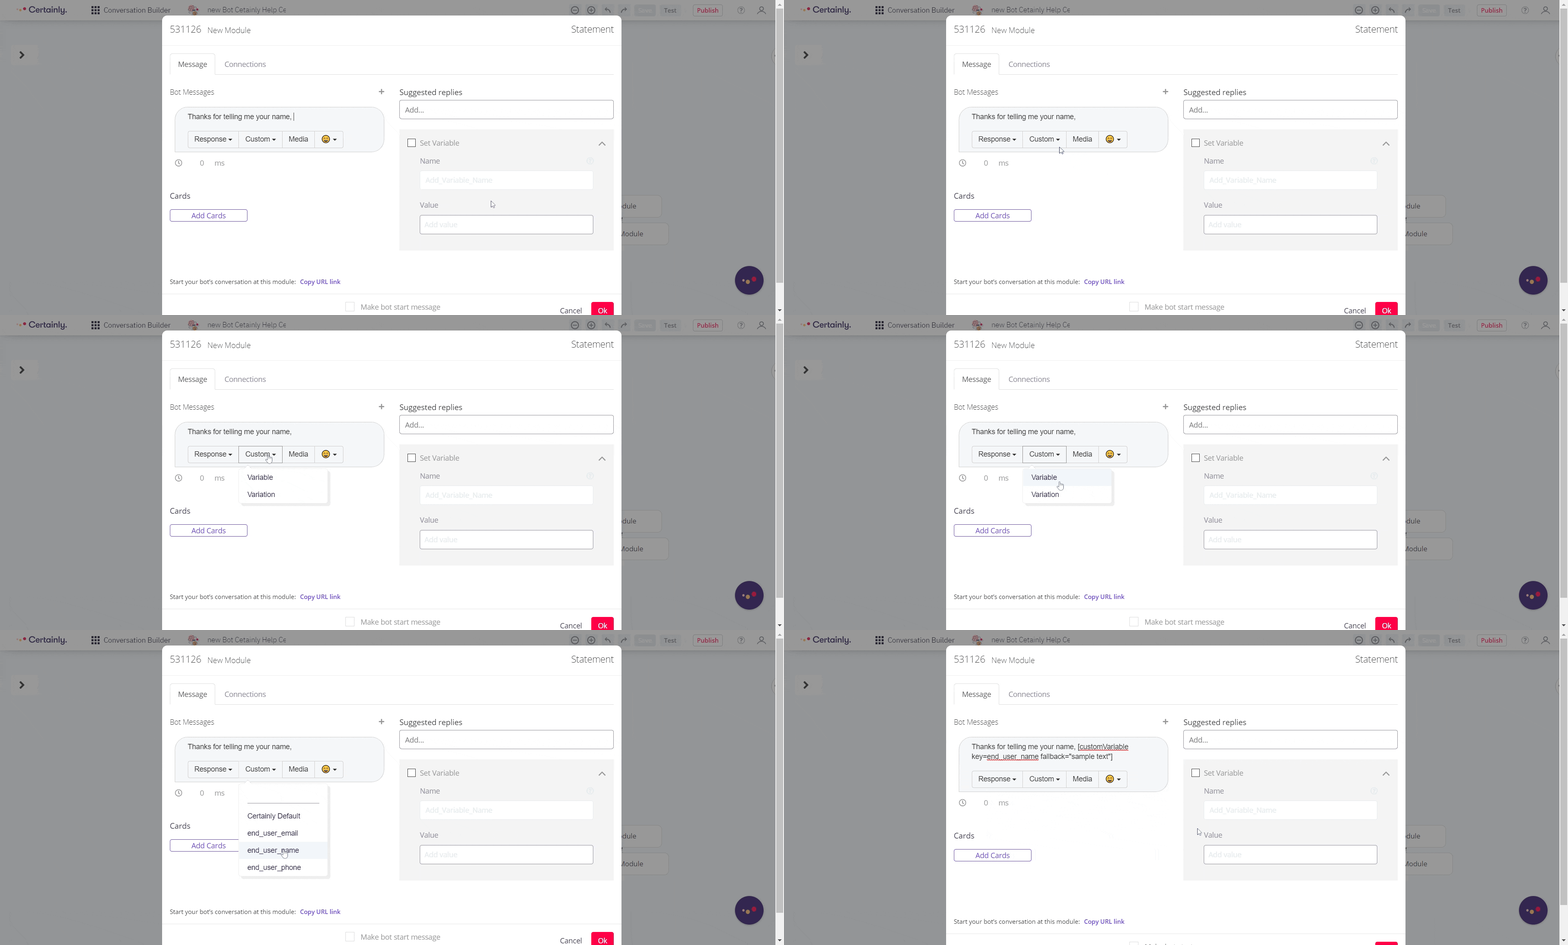
Save your changes one more time, then test your bot. This is how the conversation looks with the changes we've made:
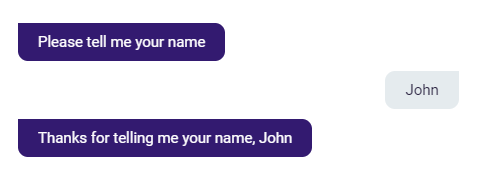
As you can see, this allows you to add a lot of useful personalization to your bot.
Storing the end user reply as an email
Next, we'll explain how to save the end user reply as an email. For use cases that require validation of the end user input (such as determining whether the response is actually an email address), we recommend using Collector Modules.
In this example, we will be using the Email Collector Module, an overview of which you can see here:
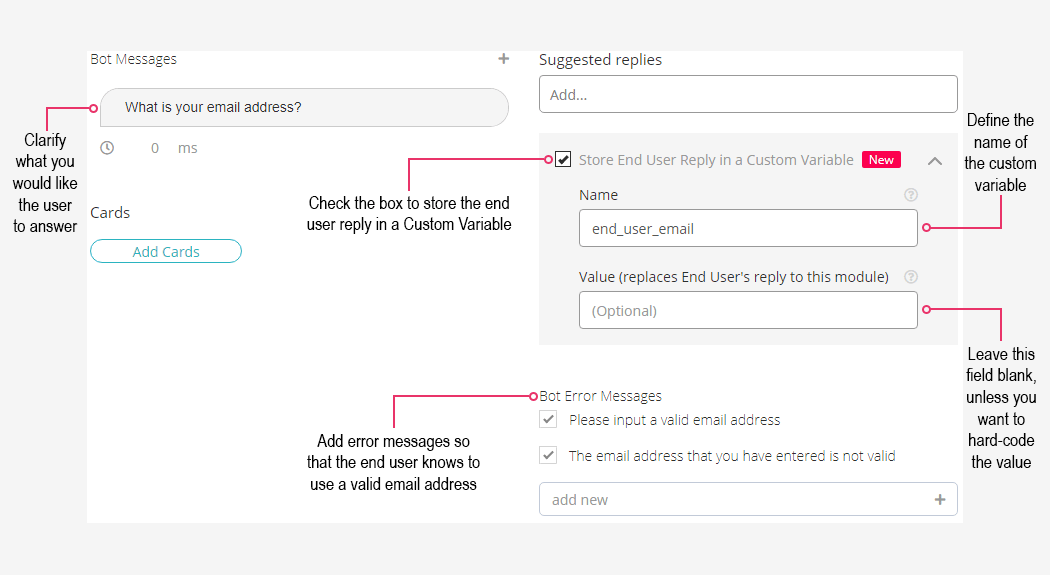
As with the previous process, you must first determine the purpose of the Module. In this example, the purpose is to collect the end user's email address, hence the Bot Message, "What is your email address?".
Next, check the "Store End User Reply in a Custom Variable" box. This allows you to input text in the "Name" and "Value" fields.
The third action you need to perform is to choose what you want to call the Custom Variable. In this example, we are using something that is very easily recognizable: "end_user_email".
Lastly, you will need to input some error messages in order to ensure that the end user inputs a valid email address.
After you've saved your changes, hit refresh (F5) and the Custom Variable will be selectable in other Modules. Try including it in one of your Modules, as displayed here:
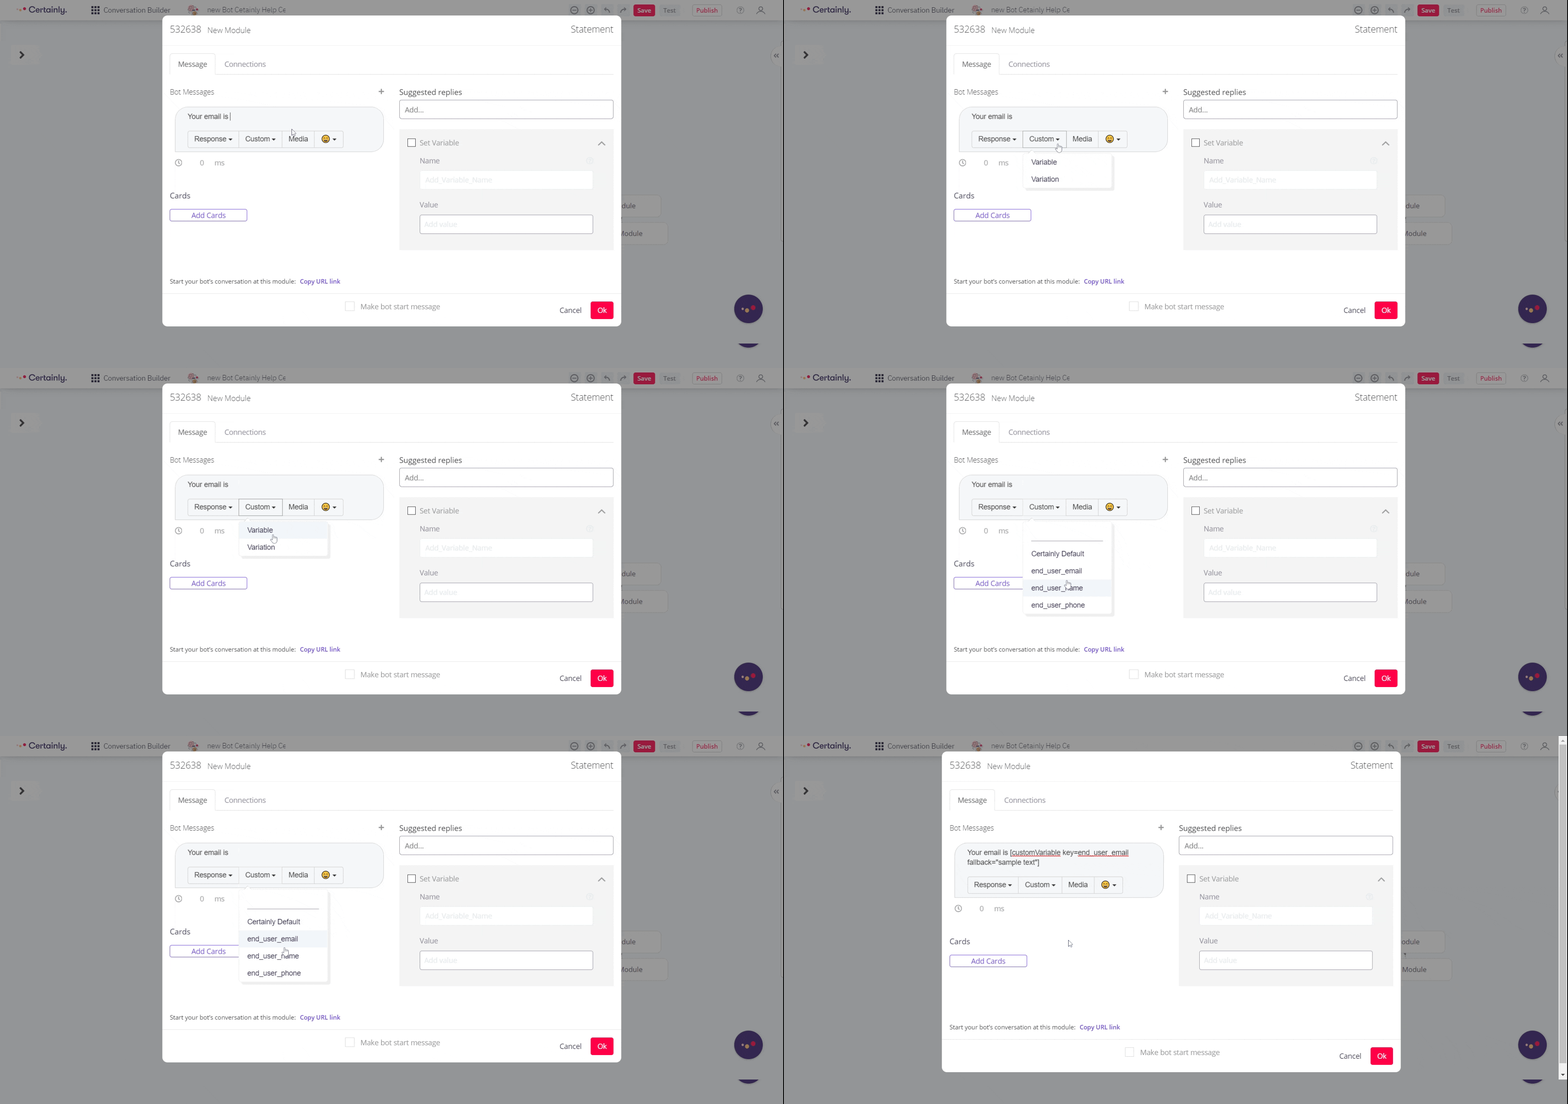
Save your changes one more time, then test your bot. This is how the conversation looks with the changes we've made:
Storing the end user reply as a phone number
Now, we'll explain how to save the end user reply as a phone number. As noted previously, for use cases that require validation of the end user input, we recommend using Collector Modules.
In this example, we will be using the Phone Number Collector Module, as shown here:
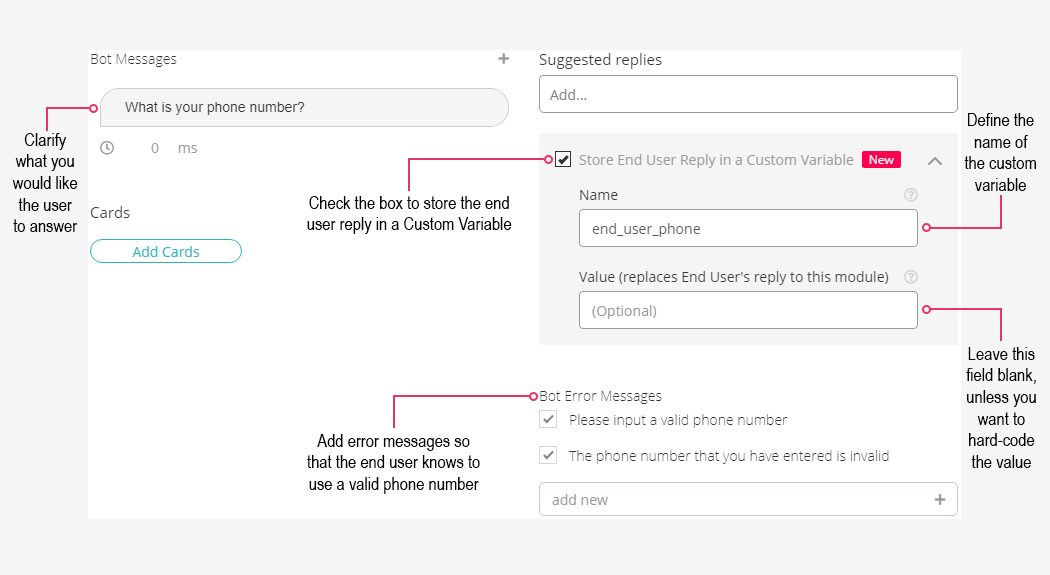
First, determine the purpose of the Module. In this example, the purpose is to collect the end user's phone number, hence the Bot Message, "What is your phone number?".
The second thing you need to do is to check the box marked "Store End User Reply in a Custom Variable". This will allow you to input text into the fields "Name" and "Value".
The third step is choosing what you want to call the Custom Variable. In this example, we are opting for something that is easy to recognize: "end_user_phone".
Finally, you will need to input some error messages in order to ensure that the end user inputs a valid phone number.
After you've saved your changes, hit refresh (F5) and the Custom Variable will be selectable in other Modules. Try including it in one of your Modules, as represented below:
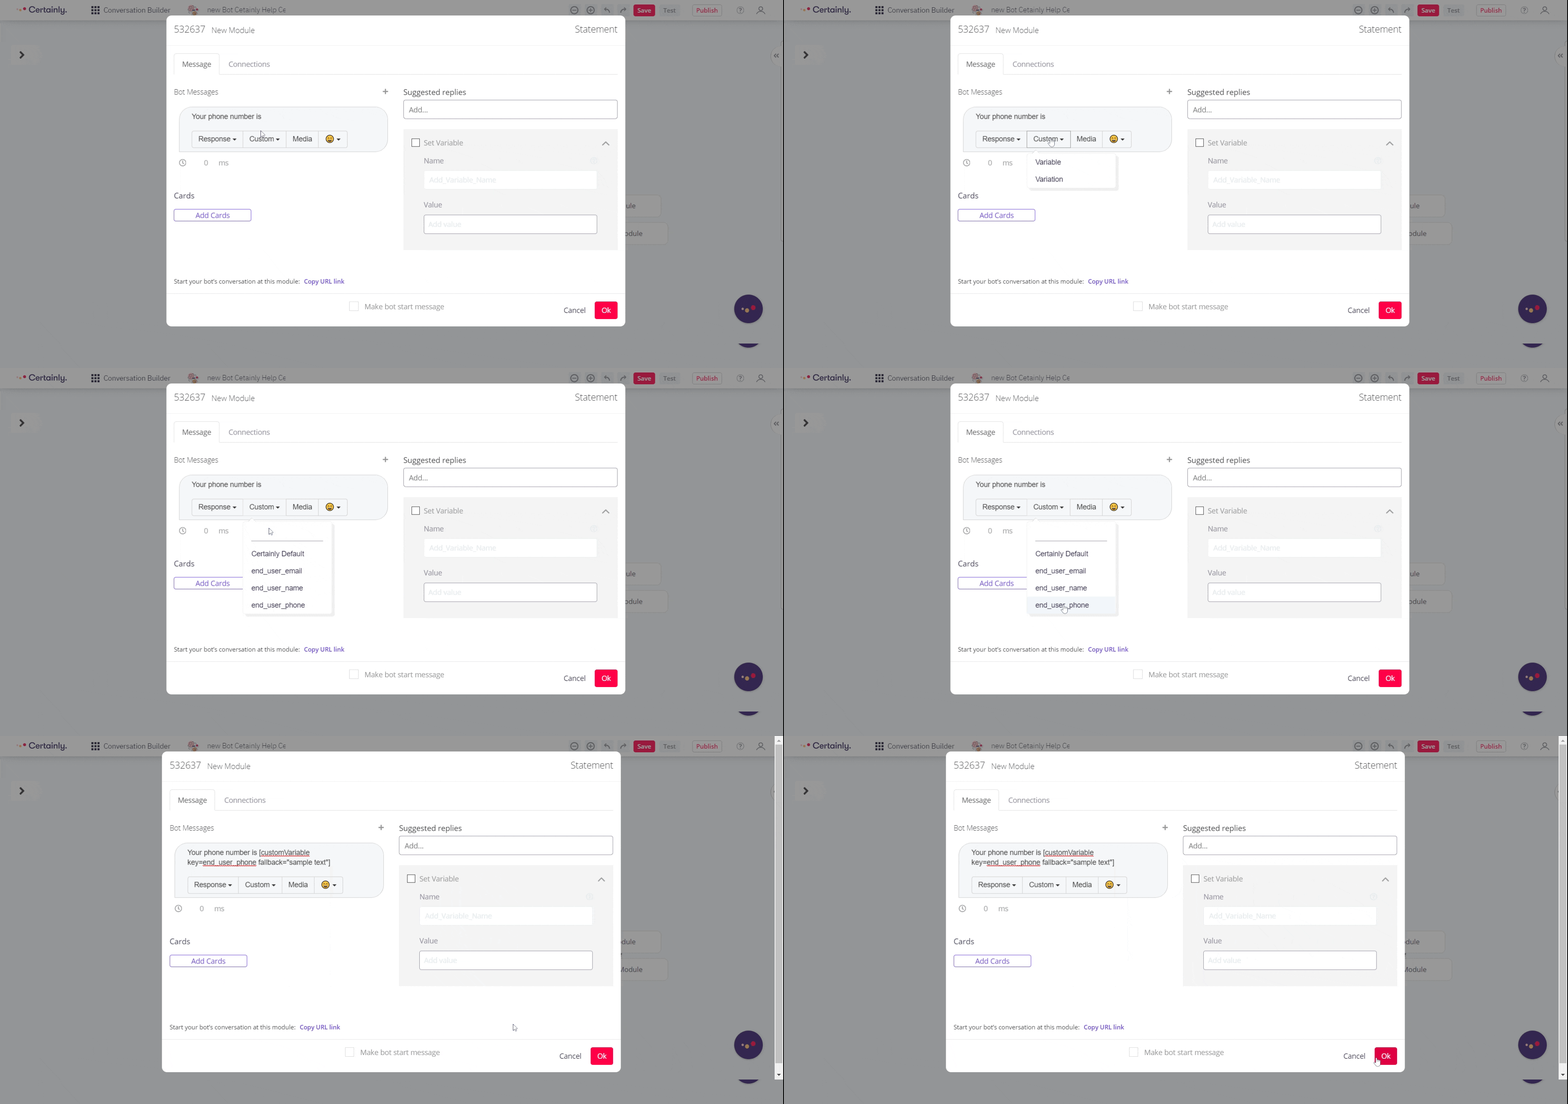
Save your changes one more time, then test the bot. This is how the conversation looks with the changes we've made:
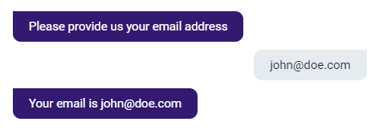
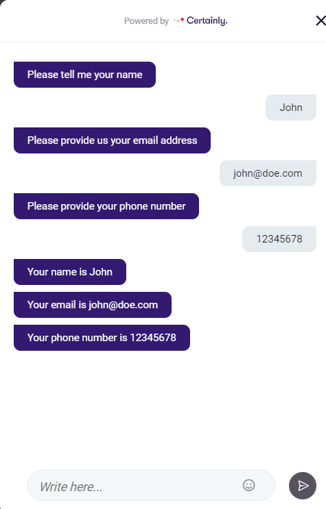
Theoretically, you can put in as many Custom Variables as you'd like in a Bot Message. So, instead of sticking to relatively simple sentences that only return one variable, as seen above, you can string all of them together at once, as shown below:
Tagging end users who have accepted the GDPR terms and conditions
Here, we provide an explanation of how the flow should be structured when tagging specific end users with certain values. In this example, we use GDPR as a subject, but the structure can be applied to any tag that you want to assign an end user.
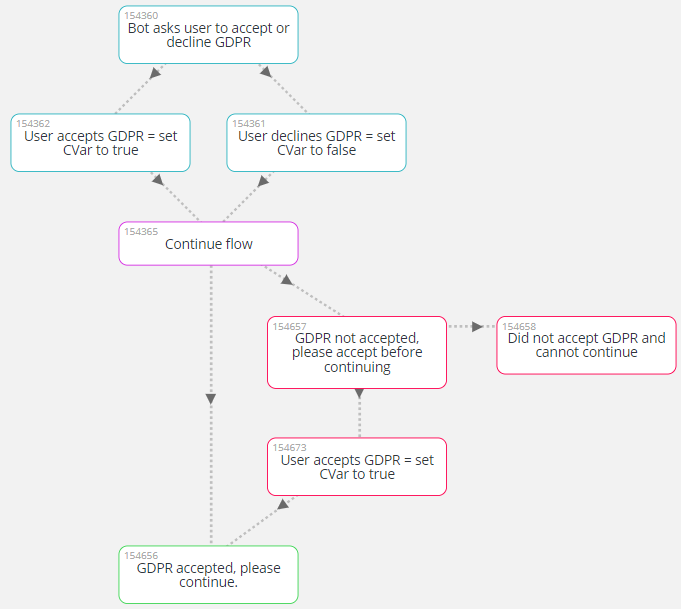
The first Module that we recommend creating when tagging end users is a Statement Module that asks whether they accept or decline the GDPR terms and conditions, as seen in Module <md>154360:

Next, you will need to send the end user to a Module based on their response. In this example, we send them to Module <md>154361 if they decline, or Module <md>154362 if they accept.
In these Modules, we create a Custom Variable named Accepted_GDPR, but instead of using the end user's reply, we hard-code the values "false" and "true":

This allows us to tag end users based on whether they've accepted or declined the GDPR terms and conditions.
Module <md>154365, marked in purple, represents any flow that you might have in a bot. In this case, it's only one Module, but it could theoretically be any number of Modules. The important thing to remember here is that everything preceding this Module (marked in teal) is there to assign a particular value to the end user.
In your flow, there might be a time when you want to exclude content from end users who have not accepted the GDPR terms and conditions. This is where the Modules marked in red (<md>154657, <md>154658, and <md>154673) are particularly useful because they force the user to either accept the terms and conditions or end up in a part of the flow where their journey can no longer continue.

