In some situations, you may find it valuable to gather data and information from the end user and send it back to your email. To accomplish this, we save the gathered data into variables and send it using a Webhook. This Webhook passes the information to a Microsoft Power Automate flow that sends the data in an email to the defined recipient.
We'll explain step by step how to implement this solution, addressing the following topics:
The approach outlined here can also be used to collect and send end-user data to other locations like databases, Microsoft Excel, and platforms that have a Microsoft Power Automate integration or a REST API interface.
Set up the flow in your Microsoft account
The good news is you don't have to create a flow from scratch! Certainly has created it already, so your job here is just to import it into your own Microsoft Power Automate account.
- Contact our Customer Success team to receive the Microsoft Power Automate flow zip.
- Import the flow we provided by following the instructions in Microsoft's documentation. If you have an existing connection to Office 365 Outlook, simply select it during this process. If you do not have an existing connection, you can create one using Microsoft's guide. Once you select "Import", your flow has been created.
- Next, navigate to "My flows". Choose the newly created flow, then select "Turn on" from the menu.
- Finally, select "Edit" to configure the flow. Change the "From (Send as)" email to an address that you want the recipient to see as the sender. If you possess HTML knowledge, feel free to edit the code of the email to style it as you prefer.
Note that the first element of the flow contains the URL where you'll send your requests:
You'll use this URL when you create the required Webhook in the next section.
Create the required Webhook
To send data to your newly imported Microsoft Power Automate flow, a Webhook has to be created on the Certainly Platform.
- Navigate to the Webhook Builder, select "Create from Scratch", then select "Webhook".

- Use the URL copied earlier as the destination of your Webhook's request.

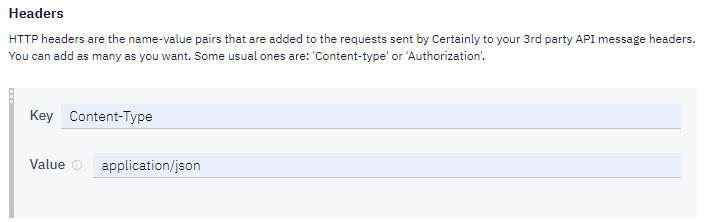
- Within the Headers section, the key should contain "Content-Type", and the value should contain "application/json".
- Finally, in the Body section, select "Add Body". Set up the body as follows, adjusting the content as needed:
{
"config": {
"subject": "Certainly Email Notification",
"featuredImage": "https://yourwebsite.com/imageofyourchoice.png",
"greeting": "Hi there!",
"introMessage": "This is a notification email coming from the Certainly Platform. Please note that the following user wants to be contacted:",
"recipient": "your@email.com",
"chatHistory": "",
"closure": "Best, Certainly.",
"postScriptum" : "P.S. Read our stories on improving people's lives via bots, AI & conversational interfaces:<a href=\"https://www.linkedin.com/company/certainly/\" target=\"_blank\" rel=\"noopener\">linkedin.com/company/certainly</a>"
},
"data": {
"Name": "{{userName}}",
"Email": "{{userEmail}}",
"Phone": "{{userPhone}}",
"Message": "{{userMessage}}",
"Location": "{{userLocation}}",
"Hardcoded string": "Hello world!",
"Link to conversation": "https://app.certainly.io/inbox/{{certainly.botId}}/{{certainly.sessionId}}"
}
}
Configure the bot
Before sending an email regarding the end user, you'll need to gather the information that will be saved.
The body of the Webhook contains a few parameters sent in the data object, as seen in the previous section. The userName, userEmail, and userMessage Custom Variables must exist inside the chatbot before they can be sent within the email.
Here, we'll share an example of how this flow could be set up.
- For each variable, you'll create a Module where you ask the user for the desired information.
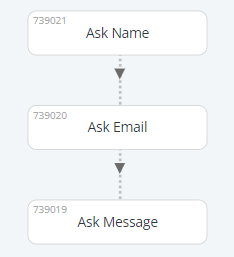
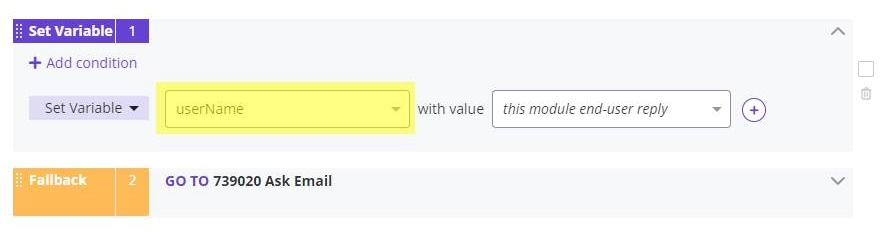
- Within each Module, you'll save the information into a Custom Variable. It is very important to use the exact name that appears in the body of the Webhook.
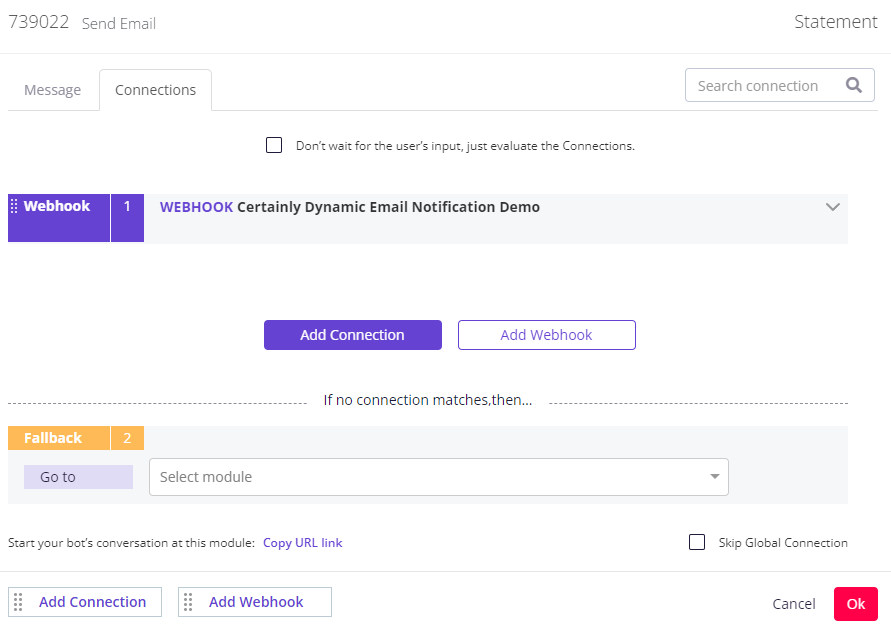
- Once you've configured the Modules that collect the information, one more Module must be created to send the email.

- Finally, insert the Webhook into the Connections tab of the <md>Send Email Module.
That's it! Now your bot will be set up to gather user data and send it to your email. Have any questions about the configuration? Just reach out to our Customer Success team.